GOMO SIM registration is a simple yet essential process for users to unlock the full potential of their mobile services. GOMO, known for its data plans that never expire, allows users to enjoy a fast and seamless digital experience by registering their SIM cards through the GOMO app. Whether you’re using a physical SIM or an eSIM, registration is a legal requirement in the Philippines.
In the Philippines, SIM registration is mandated by the SIM Registration Act (Republic Act No. 11934). This law ensures that all SIM cards are registered with government-issued IDs to prevent illegal activities and protect users’ identities. Complying with this law is crucial for securing mobile services and safeguarding personal data.
Overview of GOMO SIM
GOMO SIM is a mobile service provider offering unique perks that set it apart from traditional SIM cards. It operates under Globe Telecom and offers a seamless digital experience with no expiry data plans, fast 4G and 5G speeds, and a simple app-based management system. Whether you’re using physical SIMs or eSIMs, GOMO provides flexibility and enhanced accessibility through its mobile services.
Your GOMO SIM plays a crucial role in digital identity verification. It’s not just about making calls or sending texts anymore; registering your SIM ensures that your identity is securely linked to your mobile number. This registration enhances your digital security, helps avoid SIM misuse, and complies with national regulations in the Philippines.
Gomo SIM Registration using the Gomo PH App
Registering your GOMO SIM through the GOMO PH app is quick and straightforward, allowing you to secure your SIM card in just a few minutes. By following this step-by-step guide, you’ll be able to complete the registration process smoothly and enjoy all the benefits that GOMO offers. Here’s how you can get started:
- Go to the Google Play Store or App Store and search for the “Gomo PH” app.
- Click the “Install” button to download and install the Gomo PH app on your device.
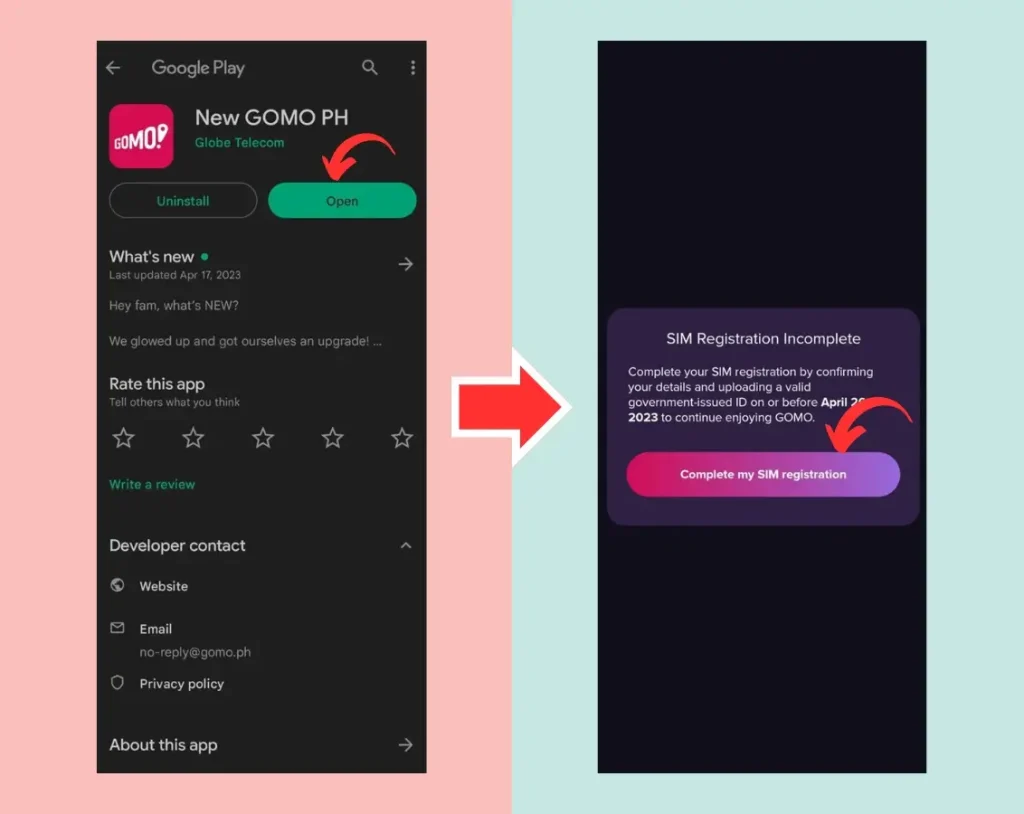
- Once installed, click “Open” to launch the Gomo PH app.
- On the app’s main screen, tap “Activate Your SIM” to start the registration process.
- A message will remind you to insert your new Gomo SIM into your phone. Click “Got it.”
- Input your Gomo mobile number and tap “Next” to proceed.

- You will receive a 6-digit OTP via text message. Enter the OTP in the app and click “Next.”
- The next page includes SIM registration FAQs. Click “Next” to continue.
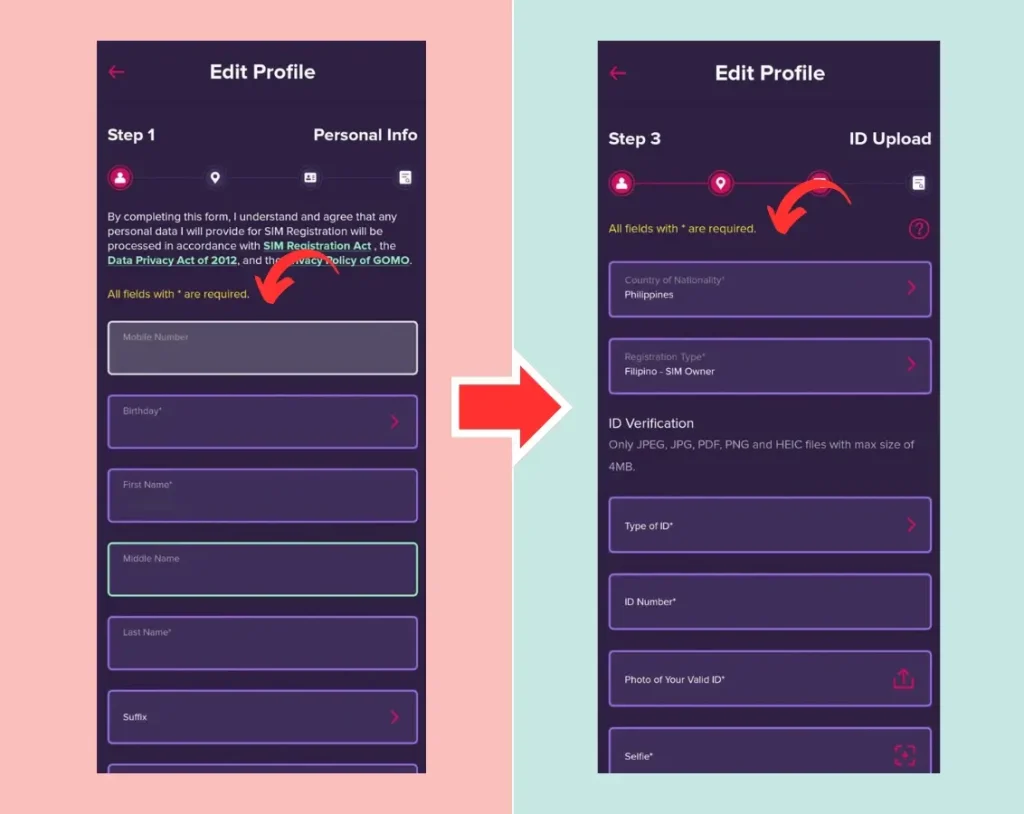
- Review the pre-encoded information in your profile and make any necessary updates.
- Provide your address details, including house number, street, village, city, and province.
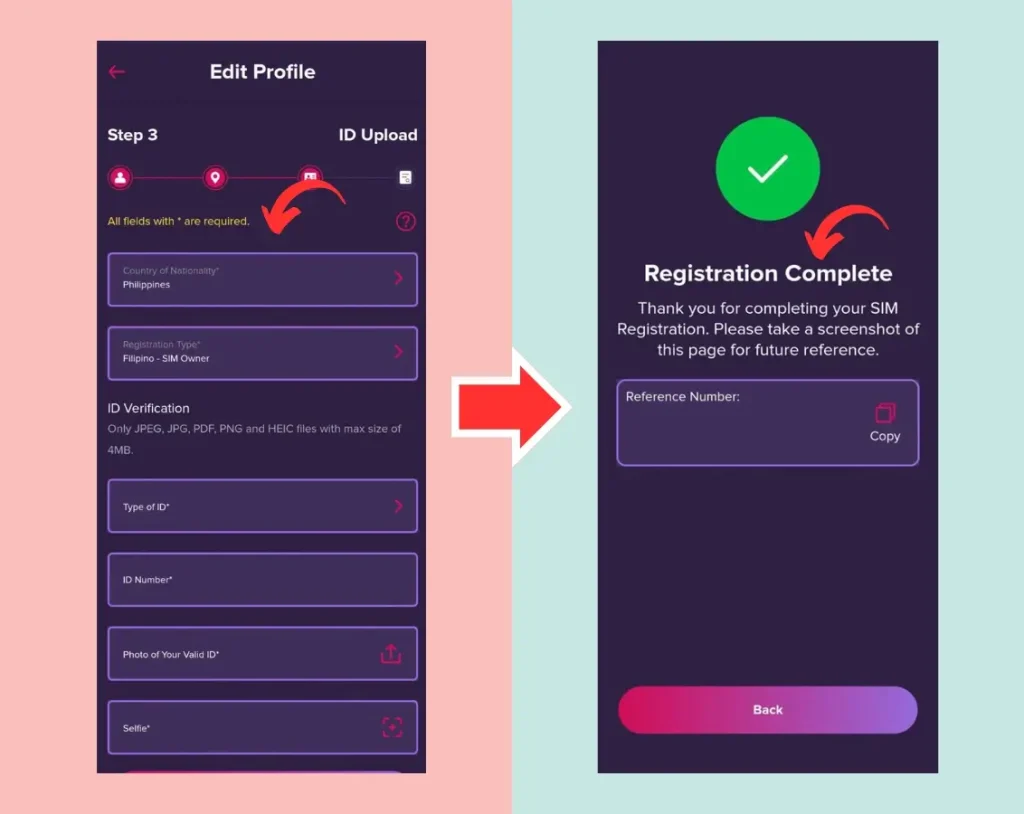
- Select the type of valid government-issued ID and upload a clear photo of it.

- The app will prompt you to take a selfie for identity verification. Click “Take Photo” and confirm.
- Check all your entered details. If there are any errors, edit them before clicking “Submit.”
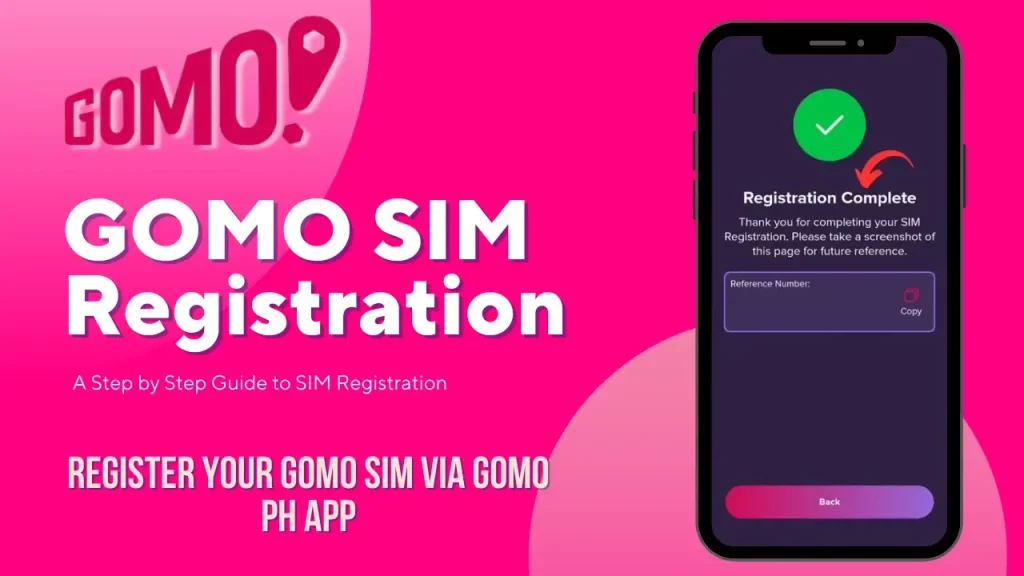
- Once submitted, you’ll see a confirmation page. Screenshot the registration reference number for future use.

- Your Gomo SIM is now registered!
How To Register GOMO SIM via Link (Web Portal)
Unfortunately, the official GOMO website at gomo.ph does not offer an option for SIM registration. However, you can visit the site to purchase a SIM, explore various data offers, and roaming promos, and manage your Mo Creds for exclusive deals tailored to your needs.
For any queries or issues related to your GOMO SIM, the website also has an FAQs section that provides solutions to common concerns like SIM registration problems, general account management, and other mobile service-related questions. This can be a helpful resource for troubleshooting without needing to contact customer support.
Documents Accepted for Gomo SIM Registration
To successfully register your GOMO SIM, you’ll need to submit a government-issued ID for verification. Below are the accepted documents for registration:
- Philippine Identification (PhilID)
- SSS ID
- Driver’s License
- Postal ID
- Voter’s ID
- Senior Citizen’s Card
- NBI Clearance
- PRC ID
- Police Clearance
- GSIS ID
- IBP ID
- PWD ID
- BIR ID
- Passport
How to Register a GOMO eSIM
Registering a GOMO eSIM is just as easy as registering a physical SIM. With an eSIM, you can enjoy the same services without needing a physical card, offering more convenience and flexibility. Follow the step-by-step guide below to complete your eSIM registration using the GOMO app:
- Download and open the GOMO app on your device.
- Sign up for a new GOMO account or log in to your existing one.
- Choose the option to activate a GOMO eSIM.
- Provide your personal information and upload a government-issued ID.
- Complete the registration by entering the OTP code sent to your phone.
- Download and install the eSIM on your device for activation.
Why SIM Registration is Important
In the Philippines, the SIM Registration Act (Republic Act No. 11934) mandates that all SIM cards must be registered with the government. This ensures compliance with national laws aimed at curbing illegal activities like fraud and scams. During registration, users must submit government-issued IDs, such as the PhilID or Driver’s License, to verify their identity.
Additionally, GOMO takes data protection seriously by employing robust security measures during the SIM registration process. It verifies your identity and secures your account using OTP (One-Time Password) codes, ensuring the encryption of all personal information and government-issued ID data to keep them safe from unauthorized access.
Common Registration Issues and How to Fix Them
Troubleshooting OTP Code Issues
If you don’t receive an OTP code, first ensure you have a stable internet connection or switch from Wi-Fi to mobile data. Double-check that your phone number is entered correctly, and try restarting your device. If the issue persists, it could be due to ad blockers or other settings, so disabling them temporarily might help.
Addressing ID and Verification Problems
Common ID verification errors often stem from uploading blurry or expired government-issued IDs. Ensure that your ID is clear, up-to-date, and matches the details you’ve entered in the app. If your submission is rejected, try retaking the photo in better lighting or with higher resolution.
Contacting GOMO Customer Support
If you encounter ongoing issues, reaching out to GOMO’s customer support team is the best way to resolve them. You can contact them via the GOMO app, or by visiting their website and accessing the support section. Additionally, their social media platforms, such as Instagram or Facebook, often provide updates and assistance.

How to Know if Your GOMO SIM is Already Registered
To check if your GOMO SIM is already registered, simply log in to the GOMO app. Navigate to your account settings, where your SIM registration status will be displayed. If your SIM is registered, it will show a confirmation message indicating that the process is complete.
If you did not receive any confirmation during registration, you can also contact GOMO customer support through the app or their website to verify your registration status and resolve any concerns.
How to Activate the Roaming Promo
To activate the GOMO Roaming Promo, you’ll need to adjust your device’s APN settings. Follow the steps below based on your device type to get your roaming service up and running.
For iOS Users:
- Open Settings: Head to the Settings app on your iPhone.
- Select Cellular: Tap on “Cellular” to access your mobile network settings.
- Access Cellular Data Network: Click on “Cellular Data Network.”
- Update APN: In the APN field, enter gomo.ph to ensure proper connectivity.
For Android Users:
- Open Settings: Go to the Settings app on your Android device.
- Find Access Point Names: Look for “Access Point Names” in the settings menu. This may be located under “SIM cards” or “Mobile networks.”
- Create a New APN: If necessary, select the option to create a new APN.
- Enter the APN: Type gomo.ph in the APN field to set it up.
Make sure to turn on mobile data and enable data roaming in your phone’s settings to fully activate the roaming promo.
Benefits of Registering Your GOMO SIM
Registering your GOMO SIM not only ensures compliance with legal requirements but also unlocks a range of features and services that enhance your overall mobile experience. By completing the registration, you’ll enjoy better data security, access to GOMO’s full range of services, and a smoother mobile experience.
Unlock Full Access to GOMO’s Features
Once registered, you can enjoy all the benefits GOMO offers, including no expiry data, fast 4G and 5G speeds, and seamless management through the GOMO app.
Enhanced Data Security
Registering with GOMO protects your personal data through its secure systems, which use OTP codes and encryption to prevent unauthorized access and safeguard your identity.
Compliance with National Laws
By registering, you ensure full compliance with the SIM Registration Act, which protects both users and the community from fraud and other illegal activities.
Conclusion of GOMO SIM Registration
Registering your GOMO SIM is a crucial step to enjoy seamless mobile services while complying with the SIM Registration Act in the Philippines. Whether you’re using a physical SIM or an eSIM, the registration process is straightforward and secure, ensuring your personal data is protected. By completing the registration, you unlock the full potential of GOMO’s unique offerings, from no expiry data to fast 5G speeds.
